This is the info for global variables for the GA4 in GTM
This is the testing info for global variables in phtml
testing on product page only for the catalog_product_view xml
welcome
for Experimental conclusionfor Additional analysis
Experimental components
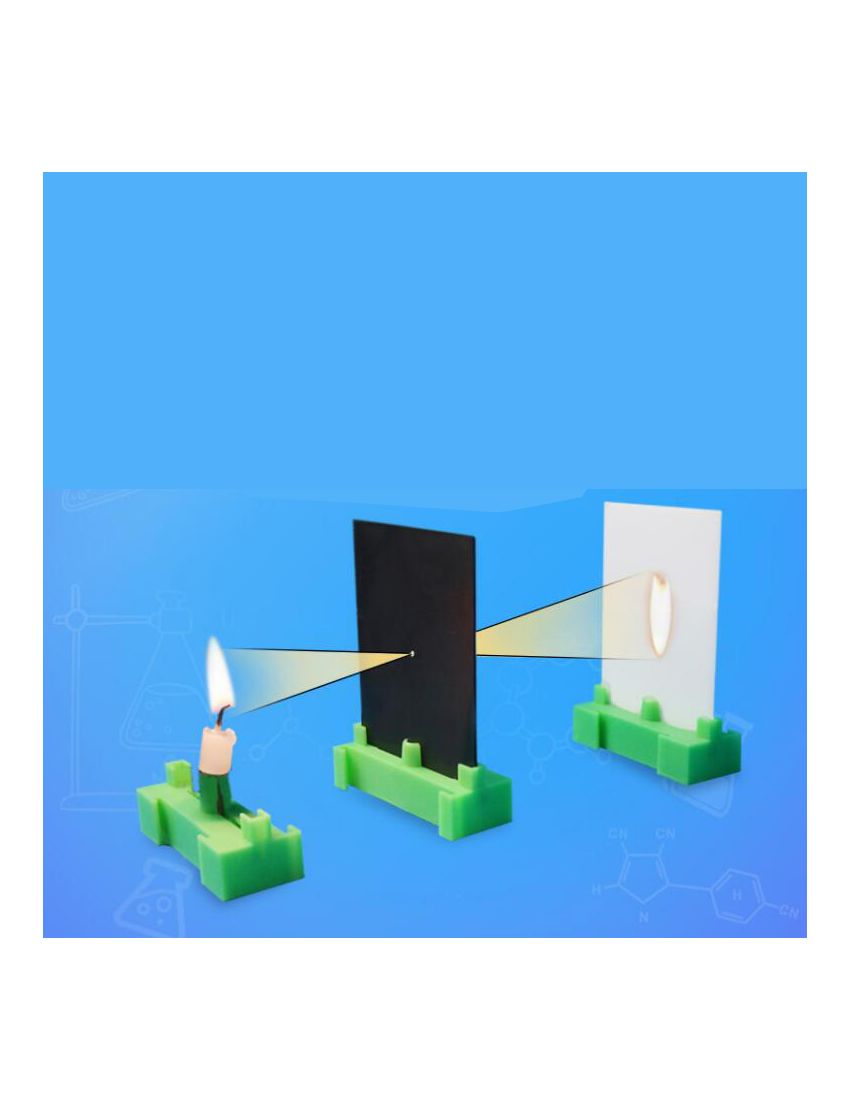
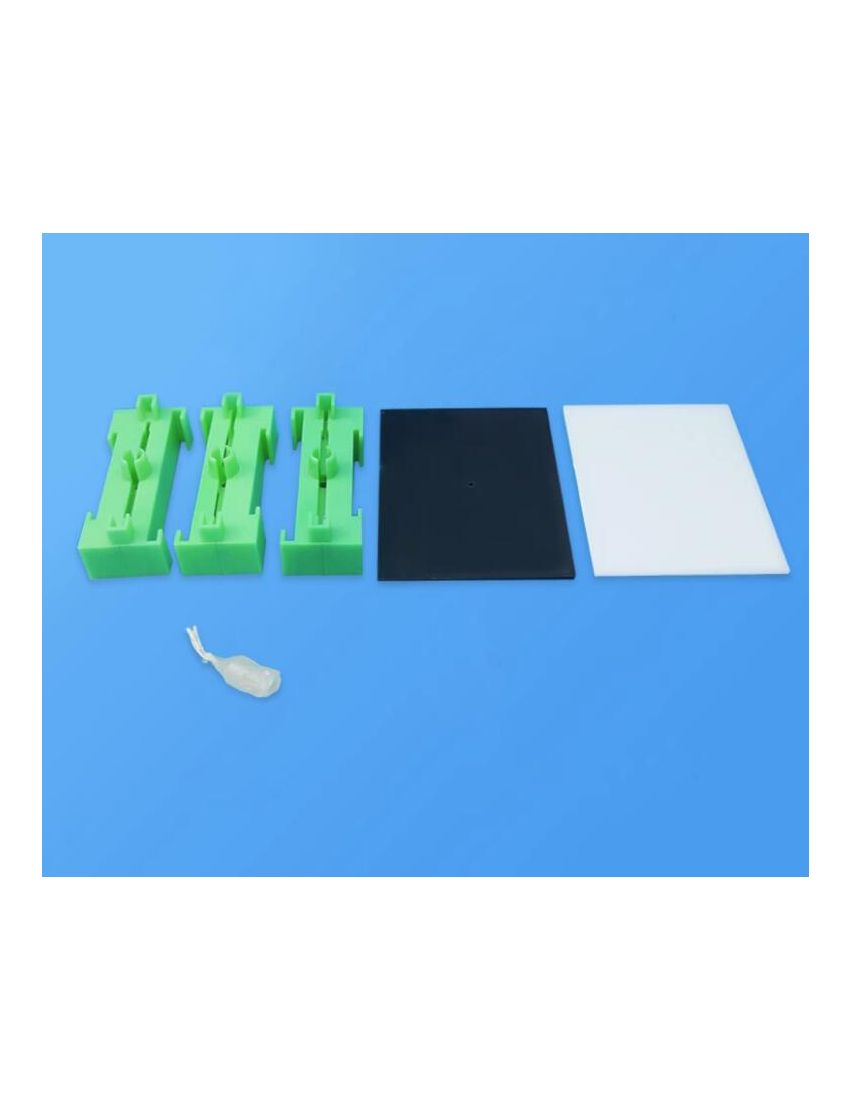
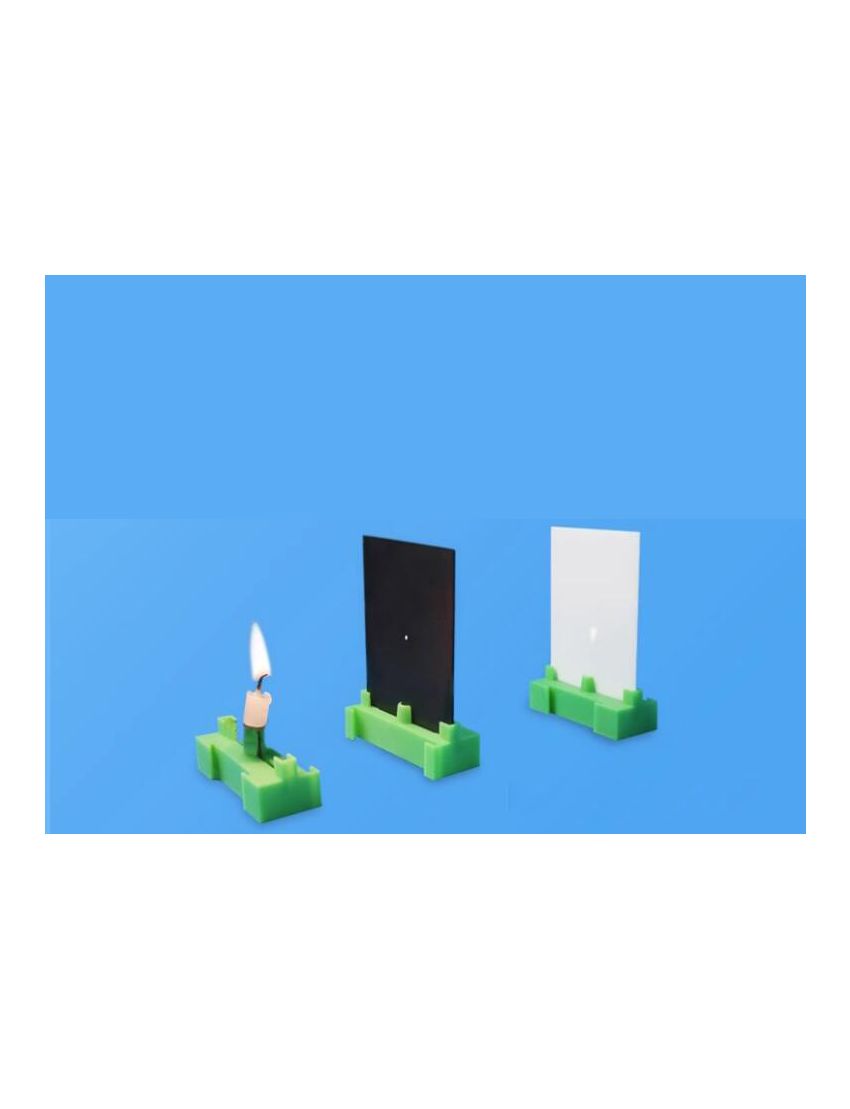
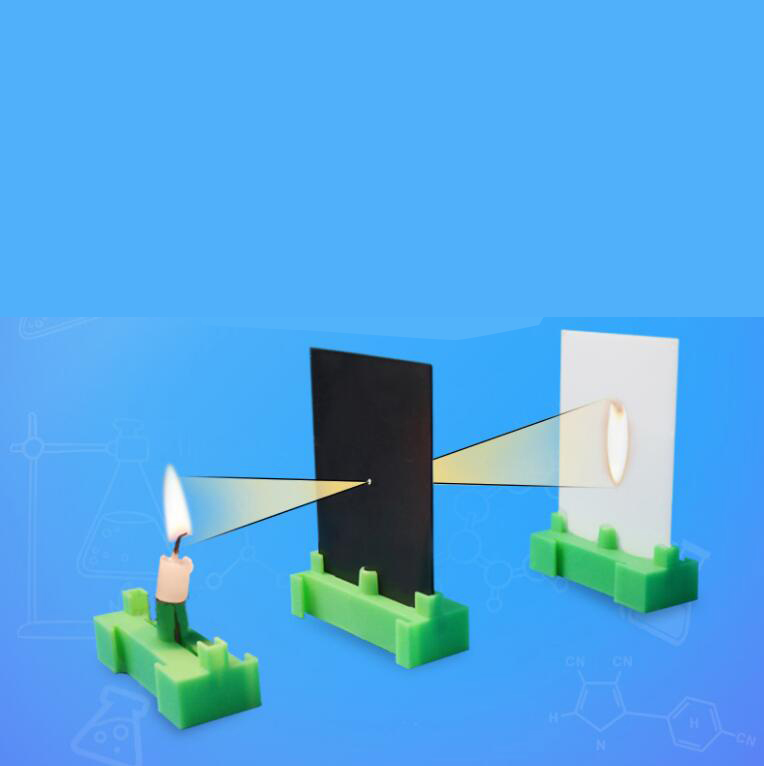
Pinhole plate, candle and candle holder, whiteboard
Experimental process
(1) Install the pinhole plate, whiteboard, candle holder and candle on the bracket(2) Keep the three bases in a straight line, then light the candle. Move the candle and whiteboard separately to keep an appropriate distance from the pinhole until you see an inverted image of the candle flame on the whiteboard.
Experimental phenomena
When the candle and whiteboard are at an appropriate distance, an inverted real image of the candle flame can be observed on the whiteboard.
Experimental conclusion
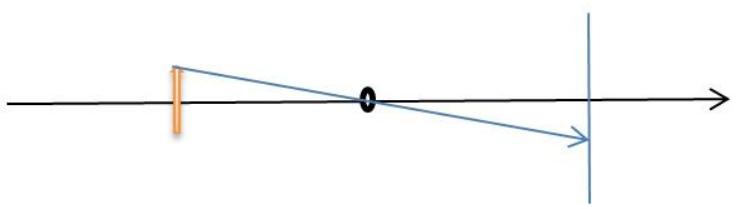
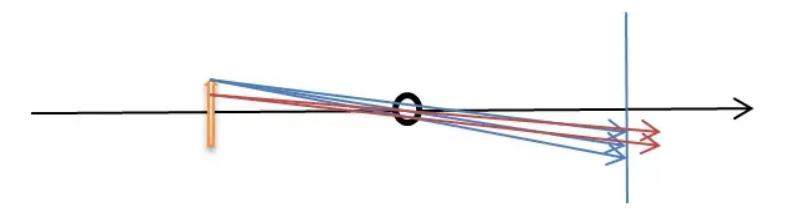
For pinhole imaging, each pixel of the "image" can be considered to be formed by each ray reaching the projection screen. The source of light is a luminous object, such as a candle. Assuming that the arrow in the figure is a luminous arrow, the light generated at its top radiates around in a straight line, but only the light that passes through the pinhole reaches the projection screen, forming a pixel. Similarly, light emitted from other parts of the arrow also passes through the pinhole to form multiple pixels on the projection screen, and eventually these pixels form a detailed image of the "arrow". As shown in the figure, since light travels in a straight line, the light from the top of the arrow reaches the bottom of the screen after passing through the pinhole, and the light from the bottom of the arrow reaches the top of the screen, so pinhole imaging is an inverted real image. By controlling the position of the projection screen, we can get images of different sizes.
Additional analysis
In pinhole imaging experiments, the only requirement for pinholes is that they must be small enough. If they are too large, experimental results are not obvious.Why is it pinhole imaging? Isn't it okay if it's a little bigger?The reason why it must be a pinhole is to ensure that only a small part of light emitted from each part of luminous arrow passes through pinhole to reach screen and form pixels at certain point or small area. If pinhole increases in size, taking top of arrow as example, light emitted from top will form pixels over larger area on screen after passing through pinhole. Similarly, light emitted from other parts of arrow will also form larger pixels. Pixels from two or more parts overlap with each other and eventually only see a light spot instead of "image". In modern terms, larger pinhole means lower resolution "image", blurrier image and eventually just a light spot.
PayPal is a secure and trusted payment processing service that allows you to shop online. PayPal can be used at labkitsforstudents.com to purchase items by Credit Card (Visa, MasterCard, Discover, and American Express), Debit Card , or E-check (i.e. using your regular Bank Account).
Pinhole plate, candle and candle holder, whiteboard
Experimental process
(1) Install the pinhole plate, whiteboard, candle holder and candle on the bracket (2) Keep the three bases in a straight line, then light the candle. Move the candle and whiteboard separately to keep an appropriate distance from the pinhole until you see an inverted image of the candle flame on the whiteboard.
Experimental phenomena
When the candle and whiteboard are at an appropriate distance, an inverted real image of the candle flame can be observed on the whiteboard.
Experimental conclusion
For pinhole imaging, each pixel of the "image" can be considered to be formed by each ray reaching the projection screen. The source of light is a luminous object, such as a candle. Assuming that the arrow in the figure is a luminous arrow, the light generated at its top radiates around in a straight line, but only the light that passes through the pinhole reaches the projection screen, forming a pixel. Similarly, light emitted from other parts of the arrow also passes through the pinhole to form multiple pixels on the projection screen, and eventually these pixels form a detailed image of the "arrow". As shown in the figure, since light travels in a straight line, the light from the top of the arrow reaches the bottom of the screen after passing through the pinhole, and the light from the bottom of the arrow reaches the top of the screen, so pinhole imaging is an inverted real image. By controlling the position of the projection screen, we can get images of different sizes.
Additional analysis
In pinhole imaging experiments, the only requirement for pinholes is that they must be small enough. If they are too large, experimental results are not obvious. Why is it pinhole imaging? Isn't it okay if it's a little bigger? The reason why it must be a pinhole is to ensure that only a small part of light emitted from each part of luminous arrow passes through pinhole to reach screen and form pixels at certain point or small area. If pinhole increases in size, taking top of arrow as example, light emitted from top will form pixels over larger area on screen after passing through pinhole. Similarly, light emitted from other parts of arrow will also form larger pixels. Pixels from two or more parts overlap with each other and eventually only see a light spot instead of "image". In modern terms, larger pinhole means lower resolution "image", blurrier image and eventually just a light spot.
S celerisque justo condimentum est venenatis morbi mi senectus a enim vestibulum sodales placerat parturient penatibus lacus vestibulum suspendisse cras parturient magnis a vestibulum. Augue ante platea consectetur velit taciti quis pulvinar egestas aliquam pharetra iaculis a dui eu euismod justo convallis. Natoque a dignissim tristique a non purus a dui euismod neque mus non a adipiscing vestibulum.
We can provide technical support for your project while using our products. If you have any other custom requirements, you can also reach out to us, and our team will design solutions that meet your needs for physical experiments. Contact us.
If you encounter quality issues within the warranty period you will be covered. Every product has 1 Year warranty period . In this case, we will usually offer you a refund or send a replacement as soon as the problem is confirmed. Sometimes you may need to ship the defective item back to us for free repair service or a new replacement. Customer should cover the return shipping fee, and labkitsforstudents.com is responsible for the shipping costs of arranging reshipment by air mail.